Tuesday, July 31, 2012

Vintage Baby Girl Book


Ivy and Elephants
Yea this post has been featured on another blog!!! Thank you Patti and Paula for the feature over at their blog, Ivy and Elephants!! Make sure you check out their classy blog full of fun vintage and victorian collections

   Hello paper lovers, thank you for stopping by! Today I have baby girl book made with vintage style scrapbook paper. I love this paper line, Little Darlings Collection by graphic 45. I find myself always wanting to make baby girl projects. I think after years of making things for my boys, I just can't resist the "girl" paper now! Or maybe I am at just hoping for a granddaughter someday! Whichever it is girly projects for now!


Handmade Scrapbook

  At first I wanted to make a banner, but then I thought a book would probably make a more "savable" keepsake.

Handmade scrapbook

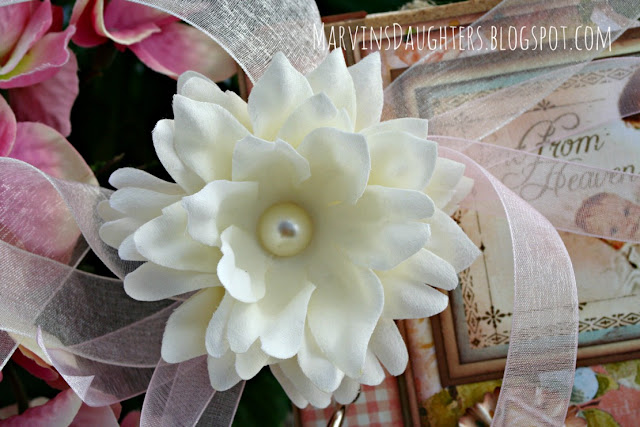
    Below is a photo of  the Jolee's fabric flower I attached with some ribbon to one of the large rings I used for the book binding.

Vintage Baby Girl Mini Album

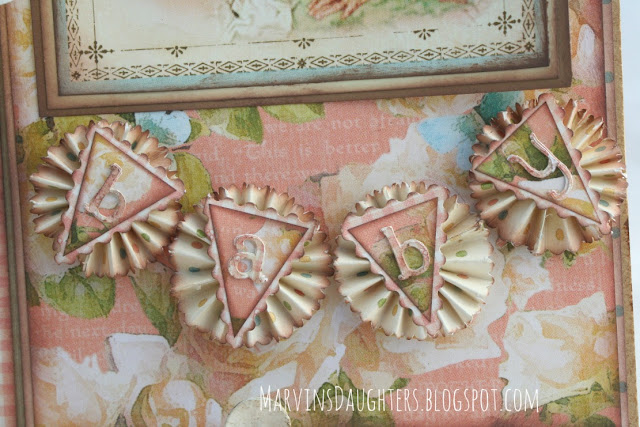
    This picture below is a close-up of the banner I made for the front cover of the book. (see I did get a banner in the project) . I made 4, one inch  pinwheels with my Martha Stewart scoreboard, I inked all the edges with brown ink. I cut the letters for baby with my Cricut, using the Mini Monogram's cartridge.

Handmade Scrapbook


Handmade Scrapbook


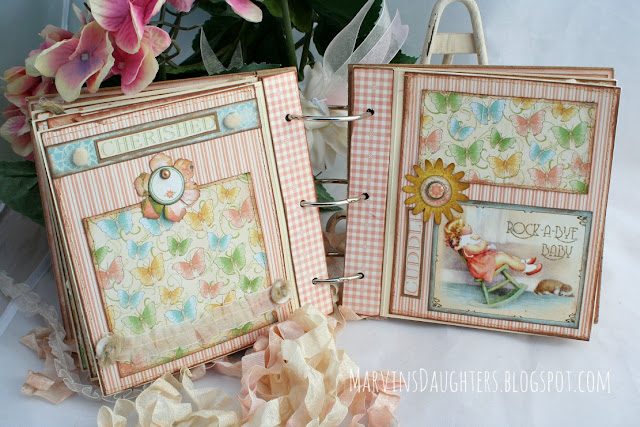
 Here is a peek of the inside cover and page one. I love all the sweet images. So soft and vintagey, I know that's not a word! But it should be!

Handmade Scrapbook

   Below a close-up of another tiny banner I made for page 2. Everything is glued down with a glue gun to hold it in place.

Handmade Scrapbook

   Pages 2 and 3. Plenty of spaces to put pictures of your little darling!

Handmade Scrapbook

   Below a picture of pages 4 and 5.

Handmade Scrapbook

   Pages 6 and 7 below.

Handmade Scrapbook

 Pages 7 and 8.

Handmade Scrapbook

 Lastly page 9 and the back cover.  This book was so easy to put together, the paper is so pretty the pages just designed themselves.

Handmade Scrapbook

 The back cover of the book.

Handmade Scrapbook


Handmade Scrapbook

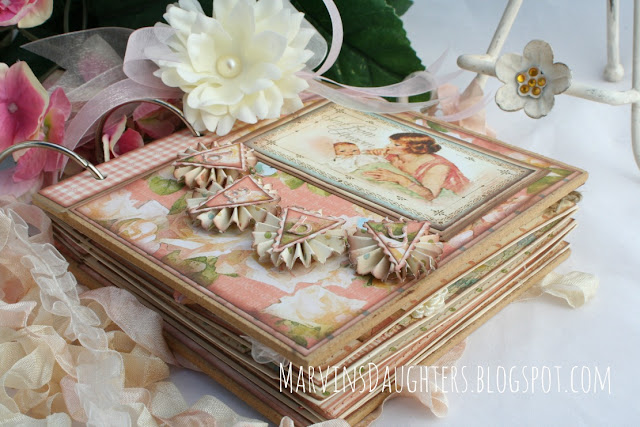
   A couple of close-ups of the front cover.  So for fun I listed and sold this book on Ebay. Many years ago I put some of my cards and scrapbook layouts on EBay and most of them sold. Sometimes I would get several bids and a few times no bids at all, which can be a blow to the creative ego, but you just create and try again, right?  There are several thousand scrapbook type pieces listed on EBay so I think it is really hit or miss as far as a buyer seeing your work. But it's fun to list something and see what kind of reaction your work gets, and the creative ego has to be tough!


Handmade Scrapbook

   All the paper and trims for this book was purchased at Paper Daises. I used the Little Darlings Collection from graphic45. And one piece of paper from the in love- our song line from webster's pages paper line. The Jolee's flower and ribbon were purchased from Michael's.
Thank you for stopping by, if your are a paper crafter let me know what your favorite style is. I like many different styles, I am usually inspired by the paper!   Have a great day! Lori


Thank you again Paula and Patti for the feature at Ivy and Elephants!! I really appreciate it! Make sure you visit their blog! You don't want to miss it!

I am sharing this post at:


Friday, July 13, 2012

Bloom Banner

  Welcome paper lovers today I have tons of pictures to show you, still working on my banner photo skills! The second I saw this paper at Paper Daisies I knew I wanted to make a Bloom banner with it. I hope the photos capture the bright colors.
Here is the banner hanging under the wisteria and outdoor nite lights.Even though this banner is made of paper, I will probably leave it outside most of the time. I love having it out there with all my blooming flowers in the backyard. I want to enjoy it every sunny day of summer!!
   A couple of close-ups.
   First I cut a large elongated triangle for each panel. I used a decorative punch for the green edging on the sides of the triangle, I used the same punch for the fuchsia trim on the pinwheel. Once again I made the pinwheel with my Martha Stewart score board. I attached the fuchsia edging before I scored the strip of paper for the pinwheel. I cut the letters with the Silhouette die cut machine, the flowers are Silhouette die cuts too. All the ribbon and paper for this project was purchased at Paper Daisies.
   I love the green rolled roses trim at the top of the paper. It adds a great texture to the banner.
   Love these colors, perfect for my summer garden.
  A few blooms from the flower cutting garden.
I am getting so much use of this turquoise vase, love the shape and color of it.
   Below some more blooms in this great plant hanger from the Old Stone House, that my son and husband got for me for this past Mother's day.

Now for some more cards. I found these cards almost finished and decided to put them together for a friend. She will be moving into a new home soon and I thought she could use them to announce her new address.
  These were from a class I did many years ago, not sure of the paper source. I did use my Cricut to cut all the die cuts.
   Here is a shot of the inside of the card, with a cute house.
 Below a picture of the back of the cards. I like to cover the back of my cards just to give them that little extra touch.
Just a few more pics, below are a couple of tags we made in a class at Paper Daisies the other night. They are Tim Holtz style Christmas tags. Can't get enough Of Tim Holtz stuff and his style.
  Wendy taught this class, she had everything cut and ready for us. I signed up for another Christmas class she has scheduled this next week (Night Before Christmas mini album). I love getting together with the ladies and making something cute!

  A quick picture of Dexter posing for me after his visit to the groomer today. He is so soft and cuddly....like a stuffed toy... that chews!!! Thank you for stopping by, please leave a comment I would love to hear from you!  Have a great day, Lori
                                                                                

Tuesday, July 3, 2012

Hip Hip Hooray!!

Thank you Megan for featuring this post at C'monGetCrafty!

C'mon Get Crafty!

  Happy 4th of July paper lovers!!! One of my favorite holidays, forecast is for a beautiful and hot 4th of July this year. Can't wait for our family and neighbor get together with all the summer staples on the menu. Then watching the fireworks with my hubby, my teenager and his friends. Not this year but soon they will be driving themselves to the festivities, let's not even go there!!!
Silhouette Die cuts
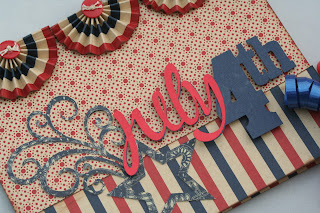
 Today's card is for a 4th of July birthday boy (man) and I hope he enjoys his day!
Silhouette Die cuts
 I used the Silhouette to cut the July 4th graphic, first using blue paper, then red. I glued the red July on top of the blue paper. The star with swirls is a Silhouette die cut too.
Silhouette Die cuts
We are keeping the menu simple for the 4th this year,  pulled pork, some Pecan corn pudding and a sugar cookie 4th of July tart. Marvin's other daughter : ) my sister, is bringing potato salad and my nephew, is in charge of deviled eggs. Grammy is making her new cole slaw recipe, can't wait to try it!  Just felt the need to let everyone know our menu, can't stop thinking of all the yummy treats, better get up and get to the gym in the morning!!
Silhouette Die cuts
 I scored the bunting folds on my Martha Stewart scoring board. I use that score board for so many things, if you are a paper crafter and you are thinking about purchasing one I say go for it! I glue gunned the bunting pieces to the top of the card, then glue gunned the buttons on. I use the glue gun to hold the bulkier things to my cards. I also use glue sticks, adhesive tape on my cards and double sided foam tape to pop things up.
Silhouette Die cuts
 Ready to celebrate! Let me know how you like to celebrate the 4th!
Silhouette DIe Cuts
 Hope everyone has a happy, healthy and safe 4th of July!
Silhouette Die Cuts
All the paper that I used on this card was purchased at Paper Daisies. They have a great selection of Americana paper.
Now a couple of photos from around the neighborhood.......
 I love this cactus plant Dexter and I pass by on our morning walk. The blooms are crazy right now.

 This flower box is thriving, bet it looks just as pretty on the inside.
 I am obsessed with this fence below.
 Each section has a different sun. Below is a close-up of my favorite sun. But really I love them all.

 The copper piece that each sun is attached to has stars cut out and swirly designs cut out too, I know the photos aren't the best...


 Below a close up of the star cut-outs.
 It was fun watching this fence come together, I think it's so unique!!
 Below is a shot of my new backyard window box that my husband built. The flowers love their new home, thanks babe!!